How to Make a Center Stage Quilt
Use the green Print button under this article to print this page. If that doesn’t work, try Ctrl-P or Flower-P. That should bring up the Printer Dialog box.
Fast and Easy Panel Quilt
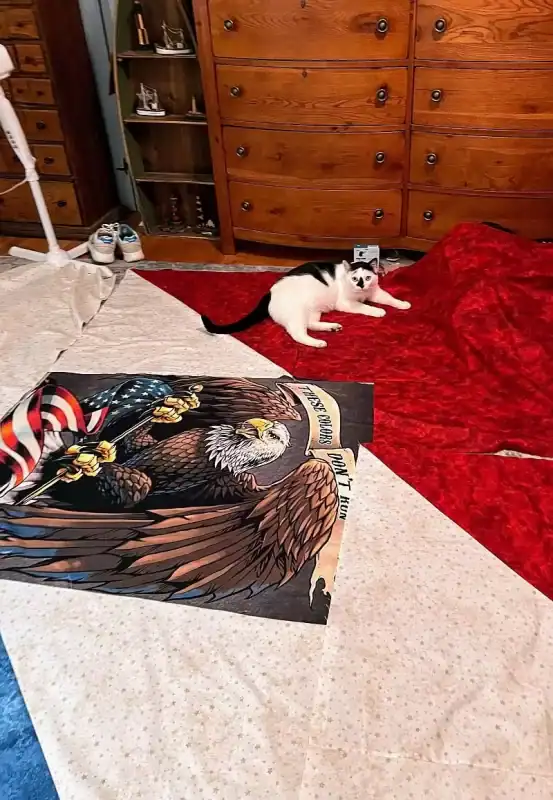
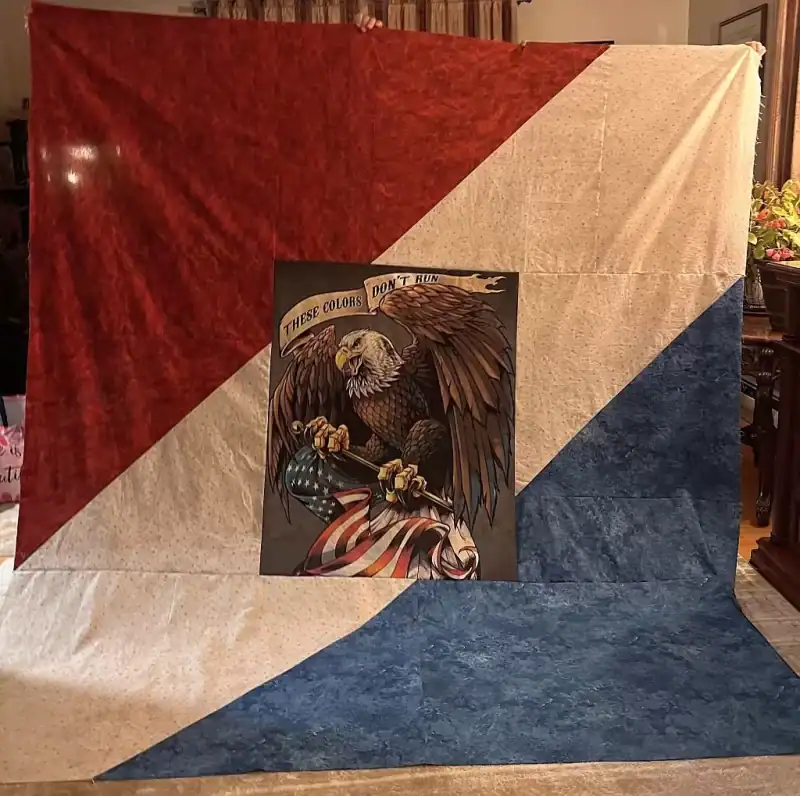
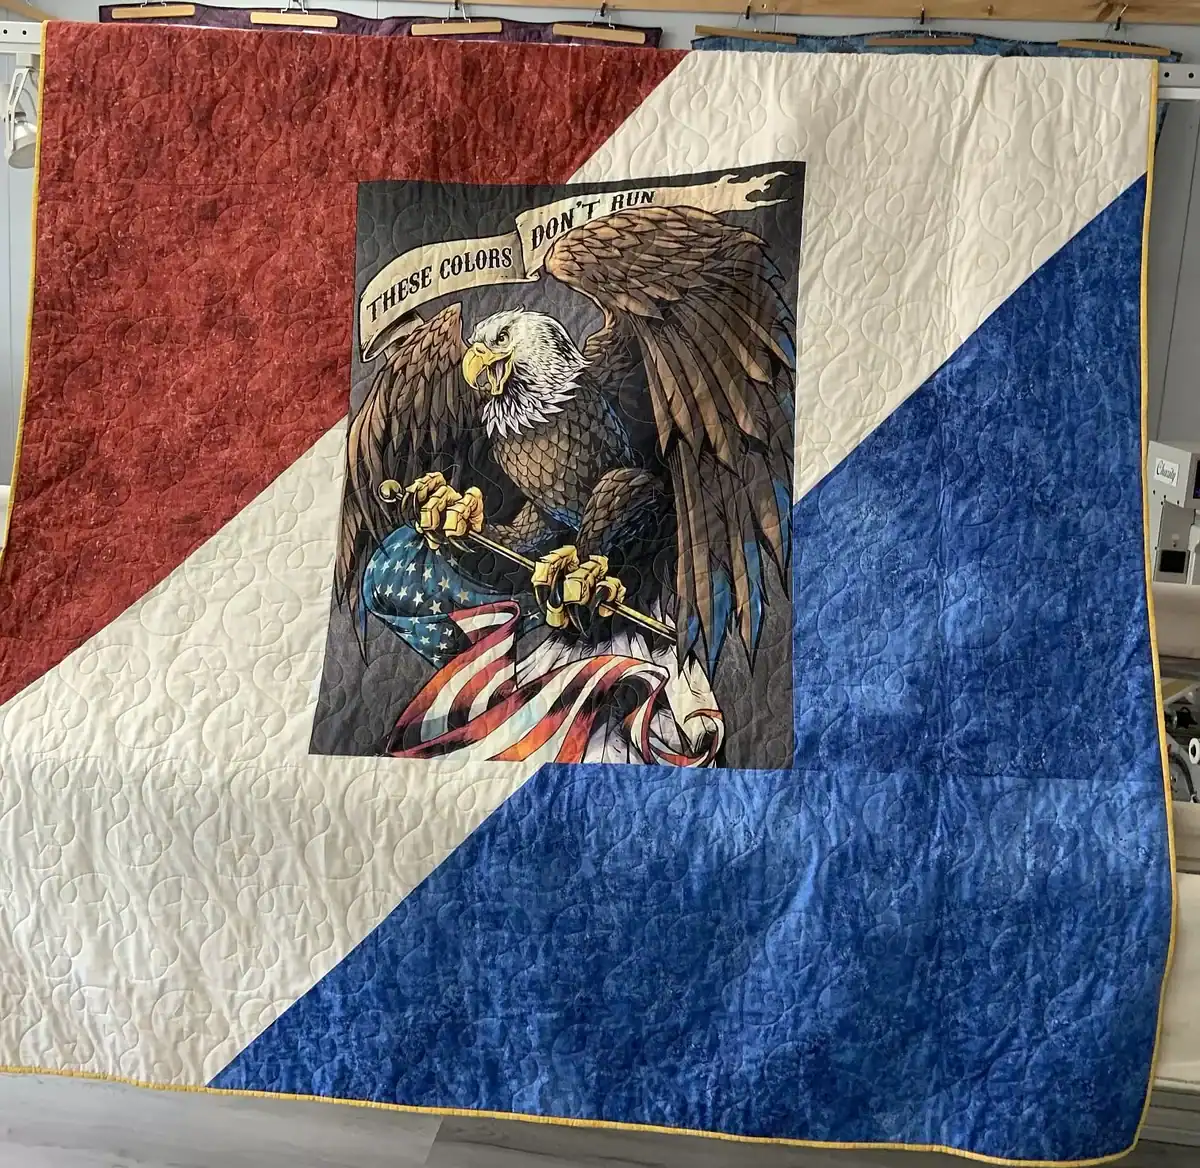
My friend Laurie and I needed a quilt for a Veterans presentation. This is NOT a Quilt of Valor, as those are smaller. This one ends up about 93″ x 101″ and uses about 7-1/2 yards of fabric in total. The picture below is our original quilt, which we made by guess and by golly. This time around, I made an actual pattern so you could make one too.
It doesn’t have to be patriotic! You panel will determine the colors you use on the side.
Requirements
- a 33-1/2″ x 41-1/2″ quilt panel
- 2-1/2 yards Red. Cut this into: (1) 30-1/2″ x 43-1/2″ rectangle; (1) 30-7/8″ square; and (1) 11-1/2″ x 30-1/2″ rectangle.
- 1-3/4 yards White. Cut this into: (2) 30-7/8″ squares and (2) 20-1/2″ x 30-1/2″ rectangles.
- 2-1/2 yards Blue. Cut this into: (1) 30-1/2″ x 43-1/2″ rectangle; (1) 30-7/8″ square; and (1) 11-1/2″ x 30-1/2″ rectangle.
- 3/4 yard Gold. Cut this into (11) 2-1/2″ wide strips for the binding.
- A long ruler
- Lots of pins
- A walking foot
sewing
First, make the HSTs using the Traditional Method. You will need (2) Blue and White ones and (2) Red and White ones. Use the 30-7/8″ squares for these HSTs. The HST should be 30-1/2″ square.
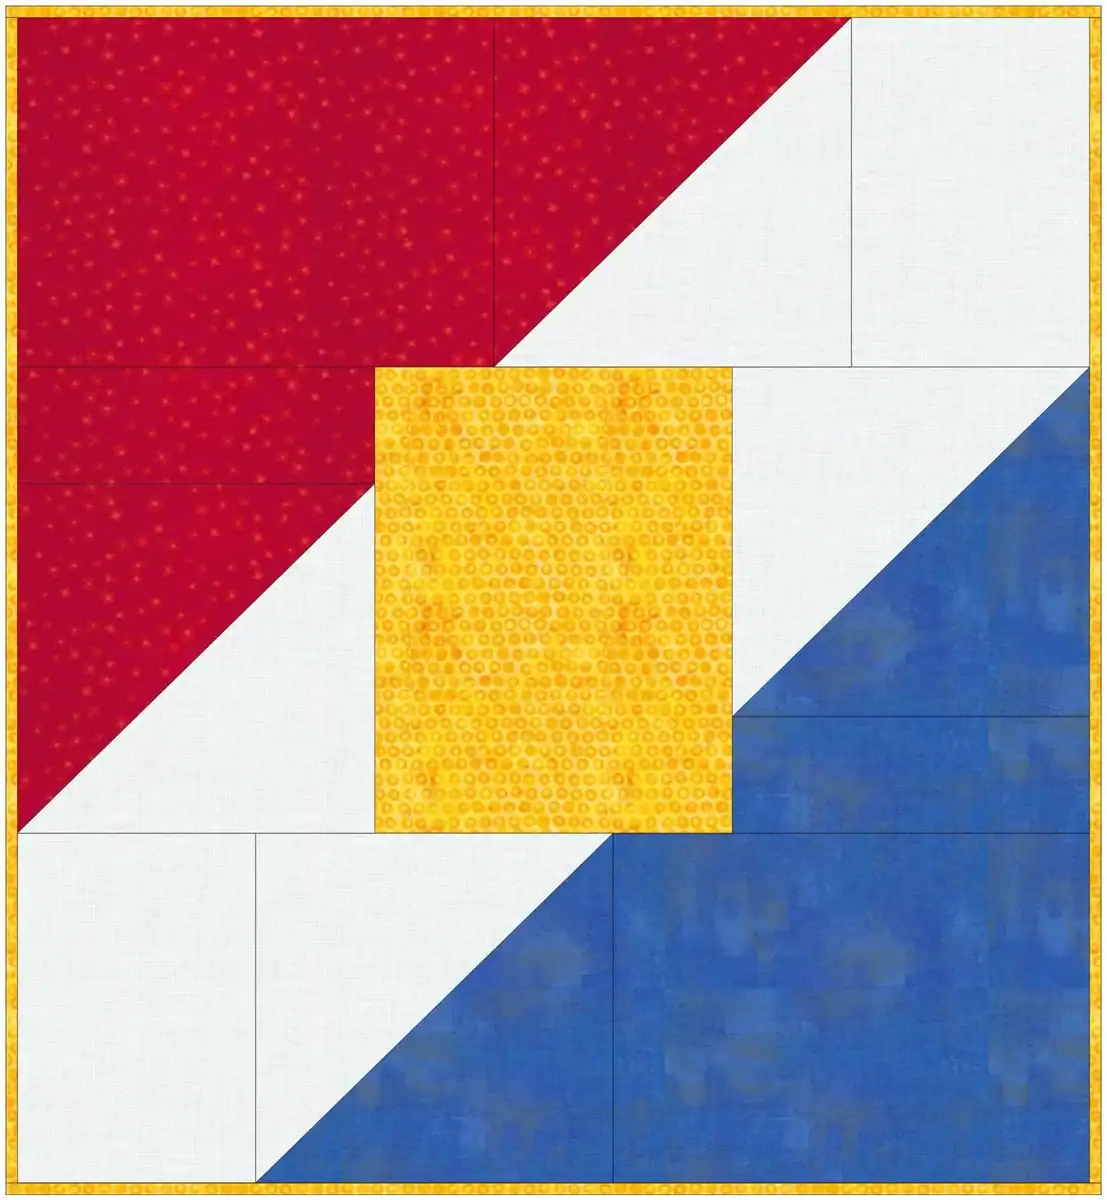
This quilt is made in rows. Use a walking foot if you have one and lots of pins. You will need them to keep everything even. The graphic below shows the layout. Click on it to view it up close. Double-check the angle of the HSTs as you are sewing.
- The first row uses the 30-1/2″ x 43-1/2″ Red rectangle sewn to the 30-1/2″ Red/White HST sewn to the 20-1/2″ x 30-1/2″ White rectangle. It will measure 30-1/2″ x 93-1/2″.
- The second row is made in two parts. First, sew the 11-1/2″ x 30-1/2″ Red rectangle to the top of the 30-1/2″ Red/White HST. Then sew the 11-1/2″ x 30-1/2″ Blue rectangle to the bottom of the 30-1/2″ Blue /White HST. Watch that HST angle!
Sew the 33-1/2″ x 41-1/2″ quilt panel between the two units you just made. This row will measure 41-1/2″ x 93-1/2″. - The third row uses the 20-1/2″ x 30-1/2″ White rectangle sewn to the 30-1/2″ Blue/White HST sewn to the 30-1/2″ x 43-1/2″ Red rectangle. It will measure 30-1/2″ x 93-1/2″.
Now just sew the three rows together and you are done! It took Laurie and I only 3 hours to put this together, even with the assistance of of the cat. If you make one of these please send me a picture. I would love to brag.